How to disassemble Lenovo ThinkPad S1 Yoga to add SSD
In this guide, I’ll disassemble Lenovo ThinkPad S1 Yoga, I will remove the hard drive. My target is upgrade the SSD.
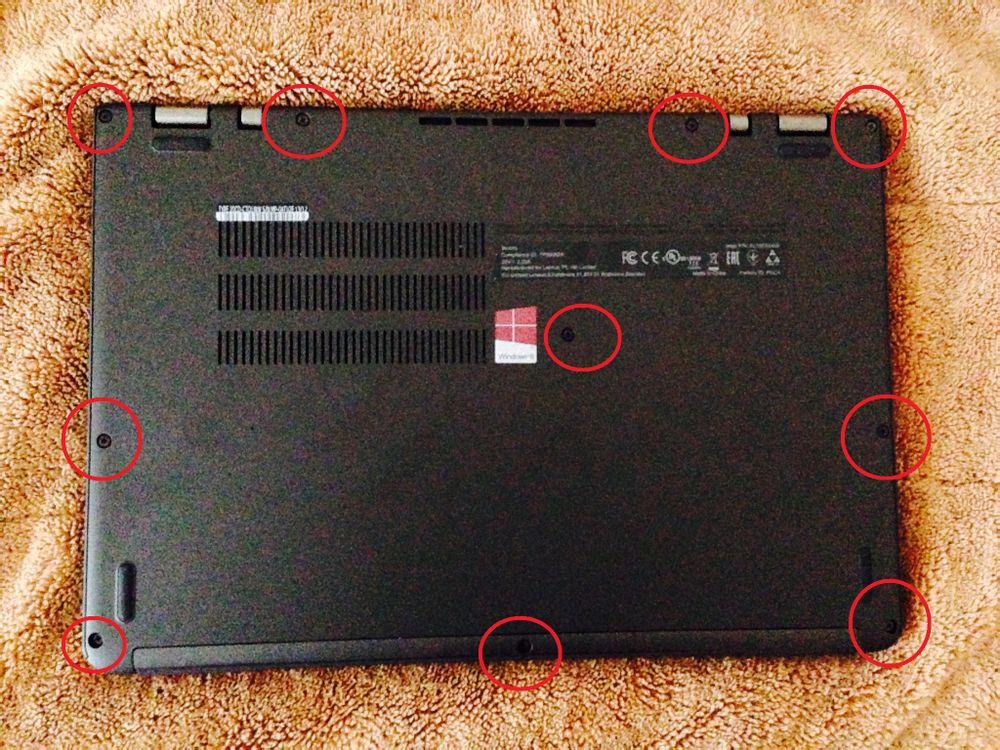
Remove ten screws from the bottom case.

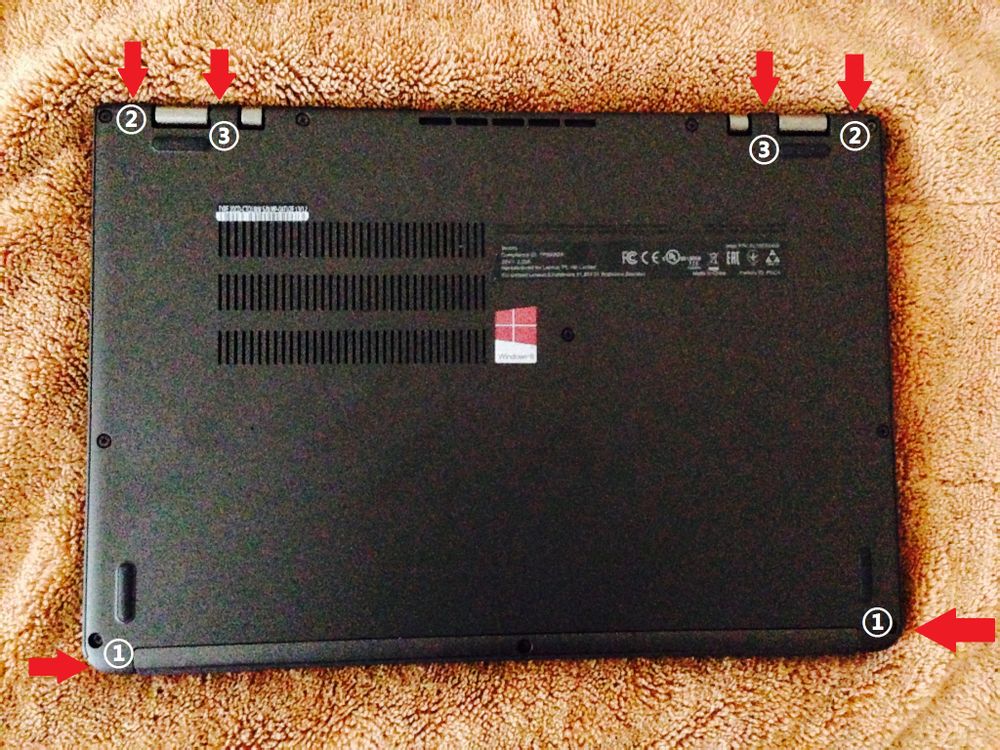
Pry up the bottom case, you can use a guitar pick, there are six hidden buttons fixed the bottom case, you need to unlock all button.

Lenovo ThinkPad S1 Yoga comes with a NGFF SSD and a 2.5″ hard drive.
I will remove the 2.5″ hard drive and replace it by 2.5″ SSD.

Remove two screws securing the hard drive module.

The hard drive module has been removed.

Remove four screws. You can remove the HDD caddy.

Install the HDD caddy to your new SSD and install to the Lenovo ThinkPad S1 Yoga.

2 Comments
Hello,
Thank you for the information on the thinkpad s1 yoga. I do have one question. My thinkpad yoga only came with an m2 ssd and I want to add an additional 2,5inch ssd.
Unfortunatly there is no hdd caddy in my laptop, do you have any idea where I can find such a caddy?
Thanks again for the information.
sorry! we have no this caddy